
Techniques
How to Frame Paint by Numbers: 5 Ways to Display Your Canvas
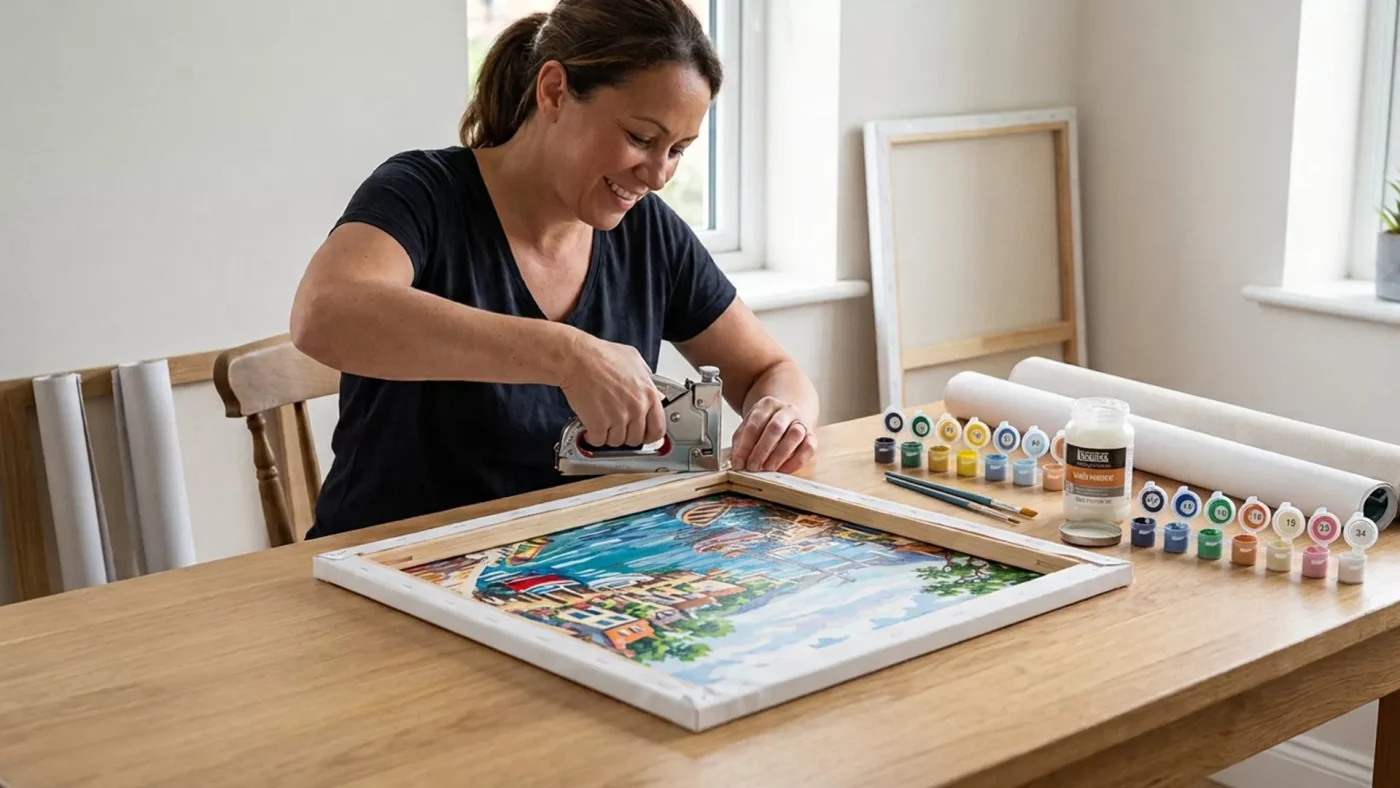
You’ve painted every last number, sealed the canvas, and stepped back to admire it. Now comes the part that turns a finished project into something you’re proud to live with: getting it on the wall. Framing a paint by numbers canvas is simpler than most people expect, and you have more options than you might think. Here’s how we’d do it — from a five-minute stretch to a gallery-worthy float frame.
Seal it before you frame it
Before we talk frames, one quick note: varnish first. A coat of sealer protects the paint from dust, fading and the odd fingerprint, and it evens out any patchy sheen so the whole piece reads as one finish. It only takes a few minutes and it’s much easier to do while the canvas is flat and unframed. If you haven’t done it yet, our sealing guide walks through matte versus gloss and exactly how to apply it. Let it cure fully, then move on to framing.
Five ways to frame a paint by numbers canvas
There’s no single “right” way — it depends on the look you want and how much effort you’re up for. Here are the five most popular routes, from easiest to most polished.
1. Stretch it on wooden bars
The classic. You mount the canvas on a lightweight wooden frame (stretcher bars) so it becomes a taut, gallery-style panel with the painting wrapping over the edges. No outer frame needed — it hangs as-is. It’s our favourite for a clean, modern look, and it’s the method we walk through step by step below.
2. Build a simple DIY frame
Once your canvas is stretched, you can add a slim wooden or aluminium frame around it for a more finished, traditional feel. Hardware-store frame kits cut to size make this genuinely beginner-friendly — a little wood glue, a few corner brackets, and you’re done.
3. Use a float frame
A float (or floater) frame surrounds a stretched canvas with a small gap, so the painting appears to “float” inside it. It’s the most gallery-like option and looks wonderful on larger pieces. The canvas sits slightly recessed, framed by a thin border of shadow — understated and expensive-looking without the expense.
4. Drop it into a ready-made frame
If your canvas matches a standard size, the fastest route is a ready-made frame from a home or craft store. Keep the canvas flat (rather than stretched) and mount it in the frame like a print. Check our size guide before you buy so you pick a frame that fits your canvas dimensions exactly.
5. Try a poster hanger
For a relaxed, no-frame look, magnetic wooden poster hangers grip the top and bottom of a flat canvas and hang from a cord. It’s minimal, quick, and easy to swap out — perfect if you like rotating your art or you’re not ready to commit to a permanent frame.
How to stretch a rolled canvas, step by step
Most of our canvases ship rolled, so stretching is the skill worth learning. It sounds fiddly; it isn’t. Here’s the reliable way to do it:
- Flatten the canvas first. If it’s been rolled, lay it face-up under a few heavy books overnight, or gently back-roll it, so it relaxes flat. A flat canvas stretches far more evenly.
- Assemble your stretcher bars. Slot the four bars together into a rectangle that matches your canvas size (minus the wrap-around margin). Check the corners are square with a set square or the corner of a book.
- Centre the canvas face-down. Lay the canvas painted-side down on a clean surface, then place the bar frame centred on top, leaving an even margin all the way around.
- Staple the middle of each side first. Fold one edge over the bar, pull it snug, and staple once in the centre. Do the same on the opposite side, then the remaining two. Working centre-out and side-to-side keeps the tension even.
- Work outward toward the corners. Add staples every few centimetres, alternating sides and pulling gently taut as you go. Stop a little short of the corners.
- Fold the corners neatly. Tuck each corner like wrapping a parcel — one flap over the other — pull tight, and staple. Clean corners are what make a stretch look professional.
- Check the front. Flip it over. The surface should be smooth and drum-taut, with no ripples. If it sags anywhere, add a staple or two to that side.
No staple gun? You can still get a tidy result with strong double-sided tape or acid-free glue on the back of the bars — just take extra care to pull the canvas evenly as you go. And if a fold cracks a little dried paint at the edge, it’s an easy fix: see our guide on reviving and touching up paint.
Choosing a frame that suits the art
The frame should serve the painting, not compete with it. A few honest pointers:
- Match the mood. A warm wood tone suits landscapes, pets and portraits; a slim black or white frame flatters bold, modern designs.
- Pull a colour from the canvas. Picking up a shade already in the painting — a soft sage, a deep navy — ties the whole piece together.
- Keep large pieces simple. Big canvases carry themselves. A float frame or a plain stretch usually looks better than a heavy, ornate border. Browse our large paint by numbers designs if you’re planning a statement wall.
- Think about the room. Match the frame to other frames nearby for a cohesive look, or go deliberately different to make the piece a focal point.
Hanging it straight, level and secure
A beautifully framed canvas hung crooked or too high loses all its magic. Get it right in five minutes:
- Height: aim for the centre of the artwork at roughly eye level — about 145–150 cm (57–60 in) from the floor. Over furniture, leave a hand’s width of gap above the sofa or console.
- Level: use a spirit level (or your phone’s level app) across the top of the frame. Mark both fixing points with a pencil before you drill.
- Wall type matters: into a stud or solid masonry, a simple screw or hook holds fine. Into plasterboard, always use a wall plug or a proper picture hook rated for the weight — a bare screw will pull out.
- Spread the weight on heavier framed pieces with two hooks rather than one; it also stops the frame drifting out of level over time.
- Add bumpers: two small felt or rubber pads on the bottom back corners keep the piece flat to the wall and easy to straighten.
Do you need glass?
Usually, no. Once a paint by numbers canvas is varnished, the sealer already protects it from dust and fading, and part of the charm of acrylic is its texture — the little ridges and brush marks that glass would flatten and hide behind a reflection. For the vast majority of finished canvases, we’d skip the glass entirely. The exceptions are a flat, unstretched canvas mounted in a ready-made frame (where glass holds it neatly and adds protection), or a piece hanging somewhere greasy or grimy, like a kitchen. Otherwise, let the paint breathe.
Displaying a set or gallery wall
If you’ve painted more than one — a trio of florals, a series of city skylines, or a growing collection — a gallery wall turns them into something greater than the sum of its parts. Keep the frames consistent (same style, same finish) so the eye reads them as a group even when the paintings differ. Lay everything on the floor first and shuffle the arrangement until it feels balanced, then keep an even gap of about 5–8 cm between frames. Cut paper templates the size of each frame and tape them to the wall to preview the layout before a single hole goes in — it saves a lot of patching later.
And if you’re painting a set as a gift, matching frames make a genuinely lovely present. You can turn several photos into a coordinated set with custom paint by numbers — a family portrait beside the family pet, or three views of a favourite place.
Give your walls something you made
Turn a photo you love into a canvas you paint yourself — proof approved before we print, free revisions until it’s right, and a keepsake worth framing.
Create My Custom Canvas